The image as a plane

Narration
A key thing to understand about basic US (and in general this is still high-end ultrasound) is that the image is a plane. While there are things like three dimensional and even four-dimensional US, it’s difficult to display it on a flat screen, so typically most US and echo is still done using two-dimensional imaging which is basically where the scan lines are arranged in a plane and they cut through the body depending on where you direct that plane. It’s what makes US so powerful in terms of where it can go, and also does make it challenging to know exactly where you’re oriented and we’ll talk about orientation a bit.
Narration
So basically we use this plane to look through the body, and in this case we are looking at a transverse image with the indicator to the patients right, or our left ( we’ll talk about indicator in a bit), but we are just looking through the abdomen, and in this case (we will talk about all these structures and what they look like), but basically we are seeing vascular structures particularly the aorta and inferior vena cava sitting on the vertebral body as we look across the abdomen and that is the plane that we are cutting through the body with.

Narration
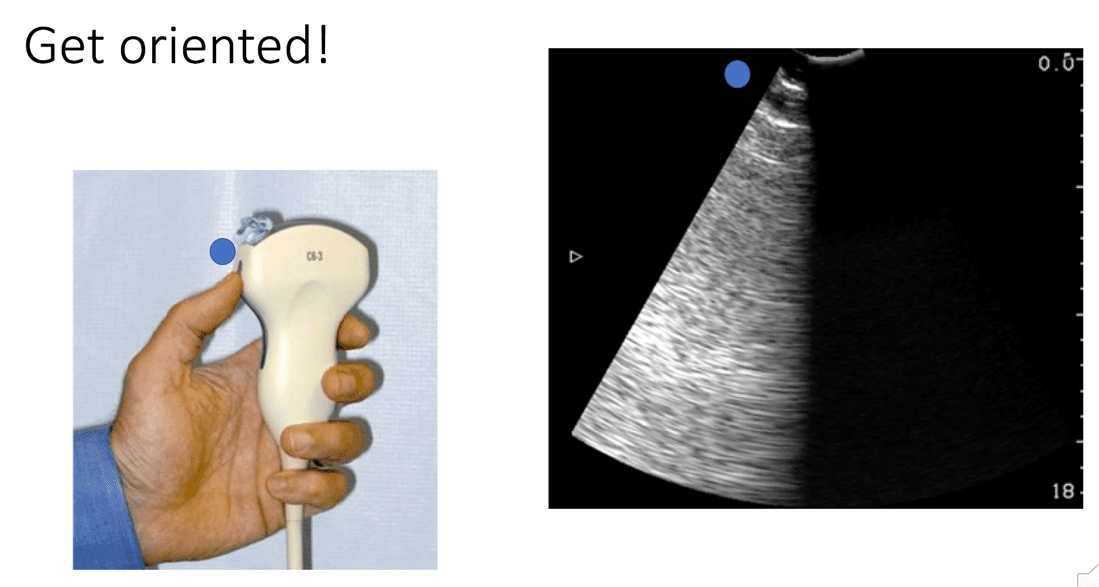
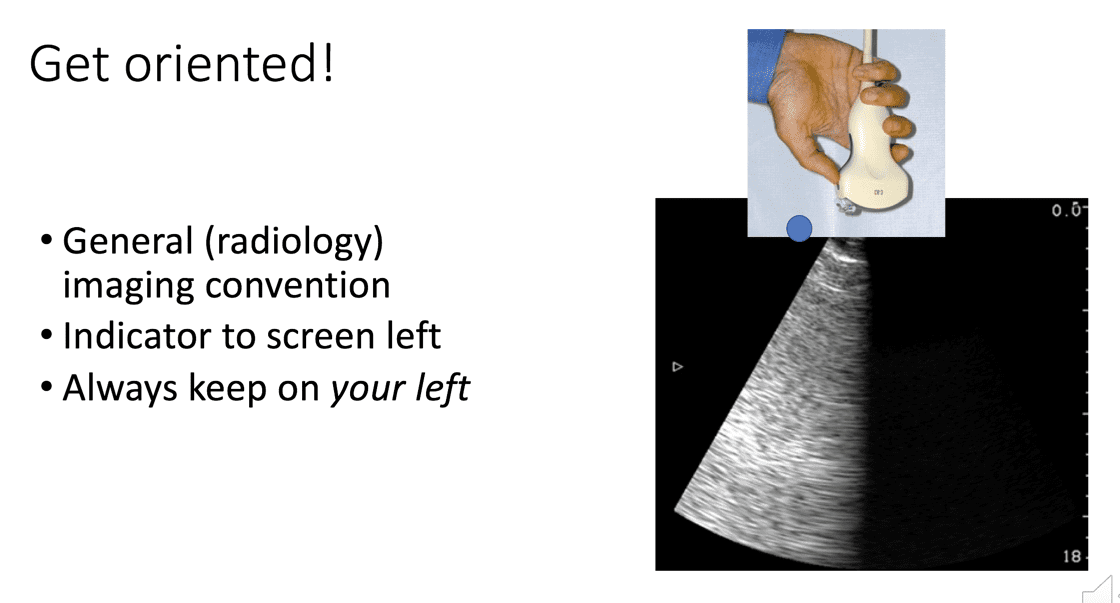
Probably the most important thing to really getting a handle on doing ultrasound yourself is to make sure that you are oriented from the beginning. Because the image is a plane, you have to pick a side that basically corresponds to what we call an indicator. So if you pick up a probe there is typically a bump or a groove and you want to check it. What I do pretty much every time I pick up a probe, is I put some gel on the side that I think is the indicator or bump (you can see my thumb there, we put a little gel). By convention in general or radiology imaging, you should see that gel light up on the left side of the screen as it is viewed. We’ll talk about the cardiology convention briefly but just know that in general the indicator corresponds with the left side of the screen.

Narration
So another way to think about it is once you put that gel on there you flip it up and just look at that image coming down from the top of the screen, because things that are closer to the probe are going to be at the top of the screen, so that gel really should be on the left side as it is viewed and the way I think about this is to always keep the indicator on my left whether I am looking from the feet upwards on the patient or on the right side looking across, and we’ll talk more about that.